

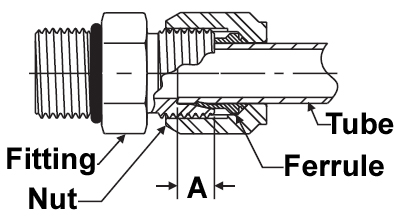
Flareless Adapter Assembly
Ferrule Preset
Prior to final installation, Flareless Tube Fittings require a presetting operation that creates a bite by the ferrule into the outer surface of the tubing. Presetting can be accomplished by using the fitting body.
Before presetting, determine the tube length allowance “A” using Table 1.
|
 |
The fitting body can be used only once for presetting and should be used during final installation with the preset tube line. The following steps are required for proper preset of the ferrule using the fitting body.
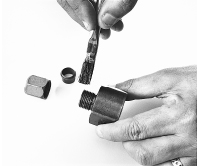 Step 1: Lubricate thread and cone of the fitting body.  Step 3: Lubricate ferrule with system fluid or a compatible lubricant. 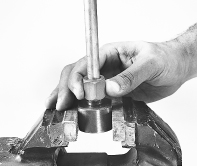 Step 5: Manually screw nut onto fitting body until finger tight. 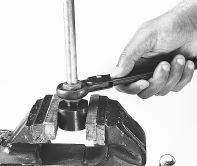 Step 7: Hold tube steady against internal shoulder of fitting body and tighten nut an additional 1¾ turns. |
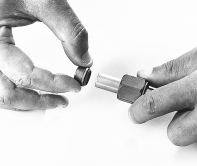 Step 2: Slip nut and ferrule over deburred tube end. Be sure the long, straight end of the ferrule points toward tube end. 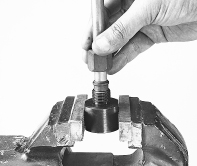 Step 4: Bottom tube end firmly on internal shoulder of fitting body. 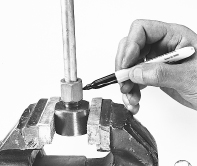 Step 6: Make reference mark on nut and tube. 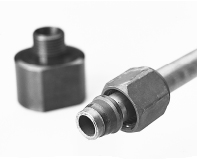 Step 8: Loosen nut and check for proper preset. use the following inspection criteria. |
Preset Inspection
All flareless tube fitting presets must be disassembled and inspected for proper ferrule preset before final installation
for service. The following detailed inspection procedures must be followed.
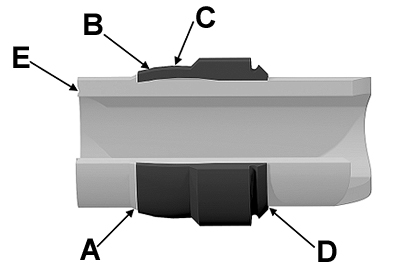
- A ridge of metal (A) has been raised above the tube surface to a height of at least 50% of the thickness of the ferrule’s leading edge, completely around the tube.
- While the leading edge of the ferrule may be coined flat (B) there is a slight bow to the balance of the pilot section (C).
- The back end of the ferrule is snug against the tube (D).
- There is a slight indentation around the end of the tube (E) that indicates the tube was bottomed in the fitting during presetting (if evidence of this complete contact is not visible the ferrule may not be properly preset).
- Avoid rotating the ferrule. Steel ferrules should not be capable of moving back and forth along the tube beyond the bite area (a stainless steel ferrule will move more than steel because of it’s spring back characteristics).
Caution: Wrench torque should never be used as the gauge for reliable Flareless preset and/or assembly. The reliability of the preset and assembly of bite type fittings is dependent on the ferrule traveling a certain distance into the tapered fitting throat in order to bite into the tube and effect a strong grip & seal.
Installation
If the fitting body was used for ferrule preset, re-tighten the nut to the same fitting body used earlier in the preset. Tighten the nut until a sudden and noticeable wrench resistance is evident. From this point, tighten the nut an additional 1/6 to 1/4 turn. (An alternative method is to take the nut to the finger-tight position, then wrench-tighten another 1/3 to 1/2 turn).
