13 Heavy Duty Truck Winter Maintenance Tips

13 Heavy-Duty Truck Winter Maintenance Tips

Winter driving can be long, icy, and tough, but you know what’s worse than trudging through a snowstorm? Doing it with a truck that’s unprepared for the season. Every year, truck drivers face the unforgiving challenges of winter weather. According to the Federal Highway Administration, 24% of weather-related vehicle crashes occur on snowy, slushy, or icy pavement. If safety and efficiency are your priorities, staying ahead with proper maintenance is the smart move when winter rolls around. Whether you’re hauling freight cross-country or managing a fleet of trucks, this guide will walk you through why winter maintenance matters and how you can prep your trucks to survive the elements.


Why Heavy-Duty Truck

Winter Maintenance Matters

Winter introduces a whole set of challenges for trucks and their drivers. 

Beyond the classic issues like icy roads and reduced visibility, extreme weather can lead to driver fatigue (it’s stressful and exhausting trying to drive in inclement weather!) and equipment breakdowns. These conditions threaten not just the truck, but everyone’s safety as well.  

Here’s why keeping your truck in top condition during winter isn’t optional—it’s essential for safety, reliability, and cost savings.  

1. Driver Safety  

Your priority on the road? Staying safe. Harsh winter conditions like black ice or heavy snow increase risks. 

A well-maintained truck provides dependable braking, better traction, and fewer chances of equipment failure. Your safety and the safety of every driver sharing the road demands preparation.  

2. Safety of the Cargo  

Cargo loss and damage aren’t just annoying—they can sink trust with your clients and hurt your bottom line. A properly winterized truck minimizes the environmental risks that compromise your load.  

3. Avoiding Costly Delays and Breakdowns  

No driver wants to find themselves stranded on the side of the road in a snowstorm. Winter maintenance drastically reduces your chances of breakdowns, keeping you running on time and trucking through route schedules smoothly.  

4. Reduced Long-Term Costs  

Winter wear can wreak havoc on underprepared trucks. Rust caused by road salt, engine strain from thickened oils, and tire breakdowns from bad traction all add up to avoidable expenses. Investing a bit in maintenance now means fewer hefty repair bills down the line.  

5. Compliance with Safety Regulations  

Failing to winterize your truck may result in non-compliance with road safety requirements, leading to fines or being taken off the road entirely. Something as simple as ignoring tire pressure regulations can escalate quickly into a dangerous (or at least, extremely expensive) situation.


How to Prepare a Truck for Winter

The first step to staying ahead of winter? Preparation. Here’s your checklist to keep your truck running like a champion, no matter what the forecast might hold.

1. Inspect Your Battery

Cold weather is notorious for draining batteries faster than any other time of year. Driving with a weak battery? Not an option. Check its charge level and replace it if necessary. Also, make sure your terminals are clean and well-connected to avoid starting trouble on frosty mornings.  

2. Make Sure Your Tires Are in Good Condition

Your tires are the unsung heroes of winter travel. Check the tread depth to make sure you get proper traction on slippery roads. 

Worn-out tires? It’s time to replace them—no cutting corners here. Don’t forget tire pressure either; colder temperatures naturally cause pressure to drop, so check and adjust it regularly to maintain stability.  

3. Check Your Fluid Levels

When temperatures sink, your truck’s fluids feel it the hardest. Monitor these key fluids and replenish them as needed:

  • Coolant and antifreeze: Check that they’re at recommended levels to prevent freezing or overheating. 
  • Fuel additives: Add anti-gelling additives to prevent diesel fuel from solidifying in extreme cold. 
  • Brake fluid, steering fluid, and transmission fluid: These should also be checked and topped up. Any deficiency could cause malfunctions right when you need them most. 

4. Monitor Your Engine and Transmission Oil

Speaking of oil, winter temperatures demand appropriate grades for optimal performance. Too thick, and you’ll stress the engine; too thin, and you won’t have the right viscosity. Consult your truck’s manual or a trusted mechanic about the right grade for cold-weather operations.  

5. Inspect the Brakes

Your truck’s braking system is its lifeline—especially on slippery winter roads. For heavy-duty trucks, air brake systems are standard and require some special attention during cold weather. Moisture build-up in the air brake system can freeze, causing serious braking issues. 

 Start by checking the air dryers; this critical component helps keep moisture out of the brake lines. Also, make sure you inspect the brake pads and rotors for wear and tear, making sure everything is in top condition. Test for any air pressure leaks and make sure your brake chambers are functioning correctly.

6. Focus on Your Hydraulics

Extreme cold can wreak havoc on your truck’s hydraulic system, making it less efficient, but properly functioning hydraulics will help keep any truck-mounted equipment fully operational during the chillier months.

 The first step? Conduct a thorough check of your hydraulic fluid. Over time, hydraulic fluids can thicken in freezing temperatures, which slows operations and puts strain on the system. Refill or replace with a low-temperature-friendly fluid if necessary.

Inspect hydraulic hoses and seals for cracks or any signs of wear. Winter temperatures can make these components brittle, increasing the risk of leaks.

7. Make Sure Your Heater and Defroster Are Working Properly

Few things are more uncomfortable (and dangerous) than driving with a poorly functioning heater or defroster in freezing weather. Before winter sets in, test your truck’s heating system to ensure it operates efficiently. Address any cold spots or weak airflow issues right away.

 Your defroster, meanwhile, helps maintain visibility by keeping your windshield clear of fog and frost. Check for any blockages in the vent ducts and confirm that the defroster works at full capacity. A warm cabin and clear sightlines make for safer, more comfortable winter driving.

8. Check the Exhaust

A blocked or damaged exhaust system can be hazardous any time of year, but it’s especially dangerous during winter. Snow, ice, or debris can clog the exhaust, causing harmful gases to back up into the cabin. Inspect the exhaust for leaks, dents, or cracks, and clear any potential obstructions.

9. Test Your Lights and Signals

Winter months bring fewer daylight hours, which means your truck’s lights and signals are working overtime to keep you visible and safe. Inspect all exterior lights—headlights, taillights, brake lights, and turning signals—to make sure they’re functioning properly. Replace any dead or dimming bulbs.

 Keep your light covers clean and consider upgrading to LED options if you haven’t already. LED lights are brighter, longer-lasting, and more reliable in chilly weather.

10. Inspect the Windshield Wipers and Fluid

Your windshield is your window to the road, and keeping it clear is non-negotiable. Replace your windshield wipers annually, as they tend to lose their effectiveness after a year of use. For winter, consider heavy-duty or winter-specific wipers designed to handle frost and sleet.

 Top off your windshield washer fluid with a winter-grade solution to prevent it from freezing. It’s one of the simplest maintenance tasks that can have a big impact on your visibility and safety during snow and rainstorms.

11. Avoid Cold Soaks

Cold soaks—when the engine fluids and components drop to ambient temperatures—are a common issue for trucks left idle in low temperatures. This condition can cause problems with starting power, battery life, and the alternator. 

You can prevent cold soaks by:

  • Using an engine block heater to keep the engine warm when the truck is parked.
  • Running the engine periodically if temperatures are expected to drop below 5°F.
  • Avoiding prolonged periods of inactivity (don’t leave your truck idle for more than 24 hours).

These steps can significantly preserve your truck’s battery and ensure that you’re ready to hit the road when needed.

12. Do an Emergency Kit Update

Winter weather can be unpredictable, so it’s smart to carry a well-stocked emergency kit. Make sure yours includes:

  • A blanket or sleeping bag for warmth
  • Water and non-perishable foods
  • Extra clothing and winter boots
  • First aid kit
  • Flashlight and extra batteries
  • Glow sticks or flares
  • Reflector triangles
  • Jumper cables
  • Portable power unit
  • Toolbox and basic repair tools
  • A tow strap or recovery strap
  • Snow shovel and ice pick
  • Sand or kitty litter for traction in icy spots
  • A battery-powered radio

Being prepared for winter emergencies can make a huge difference in staying safe and comfortable if unexpected delays or breakdowns occur.

13. Keep Your Fuel Tank at Least Half Full

During the colder months, condensation in a near-empty fuel tank can lead to water contamination, which may freeze and block fuel lines. To reduce this risk, always keep your fuel tank at least half full. Not only does this prevent freezing, but it can also provide extra weight and traction for your truck.


A Few Final Tips for Winter Maintenance

Routine inspections are your best defense against winter breakdowns. Create a maintenance schedule that prioritizes seasonal needs like these winter-specific tips. Prevention is far easier—and more cost-effective—than emergency repairs.

 Remember, snowstorms and icy conditions can crop up quickly. Stay ahead by monitoring the weather forecast in regions you’ll be driving through. While you should always follow these winter maintenance tasks before any long trip, it’s still wise to get a general idea of what to expect when you’re out there on the road. 

Ultimately, by being proactive, you’ll protect your vehicle, protect yourself, and minimize costly downtime.

Looking for all the essentials to help you breeze through your maintenance checklist without a hitch? At Hose and Fittings, we offer a wide range of supplies, equipment, and components to help you keep your fleet in tip-top shape. 

Reach out to us today to stock up—and have a safe trip!


Relevant Link: 
Your Snow Plow Inspection Checklist: What to Do Before the Snow Starts to Fly

Your Snow Plow Inspection Checklist: What to Do Before the Snow Starts to Fly

How familiar is this situation? It’s 5 AM, the snow started falling overnight, and you’re ready to clear your driveway or get to work plowing.

You hop into your truck, attach your snow plow, and… nothing works.

It sounds like a worst-case scenario, but unfortunately, it’s quite common.

The good news? Avoiding this nightmare requires just a bit of preparation. Before the first snowflake falls, you need to set aside some time for a snow plow inspection.

Whether you’re a homeowner with a plow attachment or a seasoned snow plow operator, inspecting your equipment is not just a smart move that can help you get ahead this season – it’s something you should be doing if you care about the longevity of your plow. Thorough checks now can maximize your plow’s performance, prevent safety risks, and even save you money. Most importantly, you’ll have peace of mind knowing you’re ready for whatever grumpy Old Man winter throws your way.


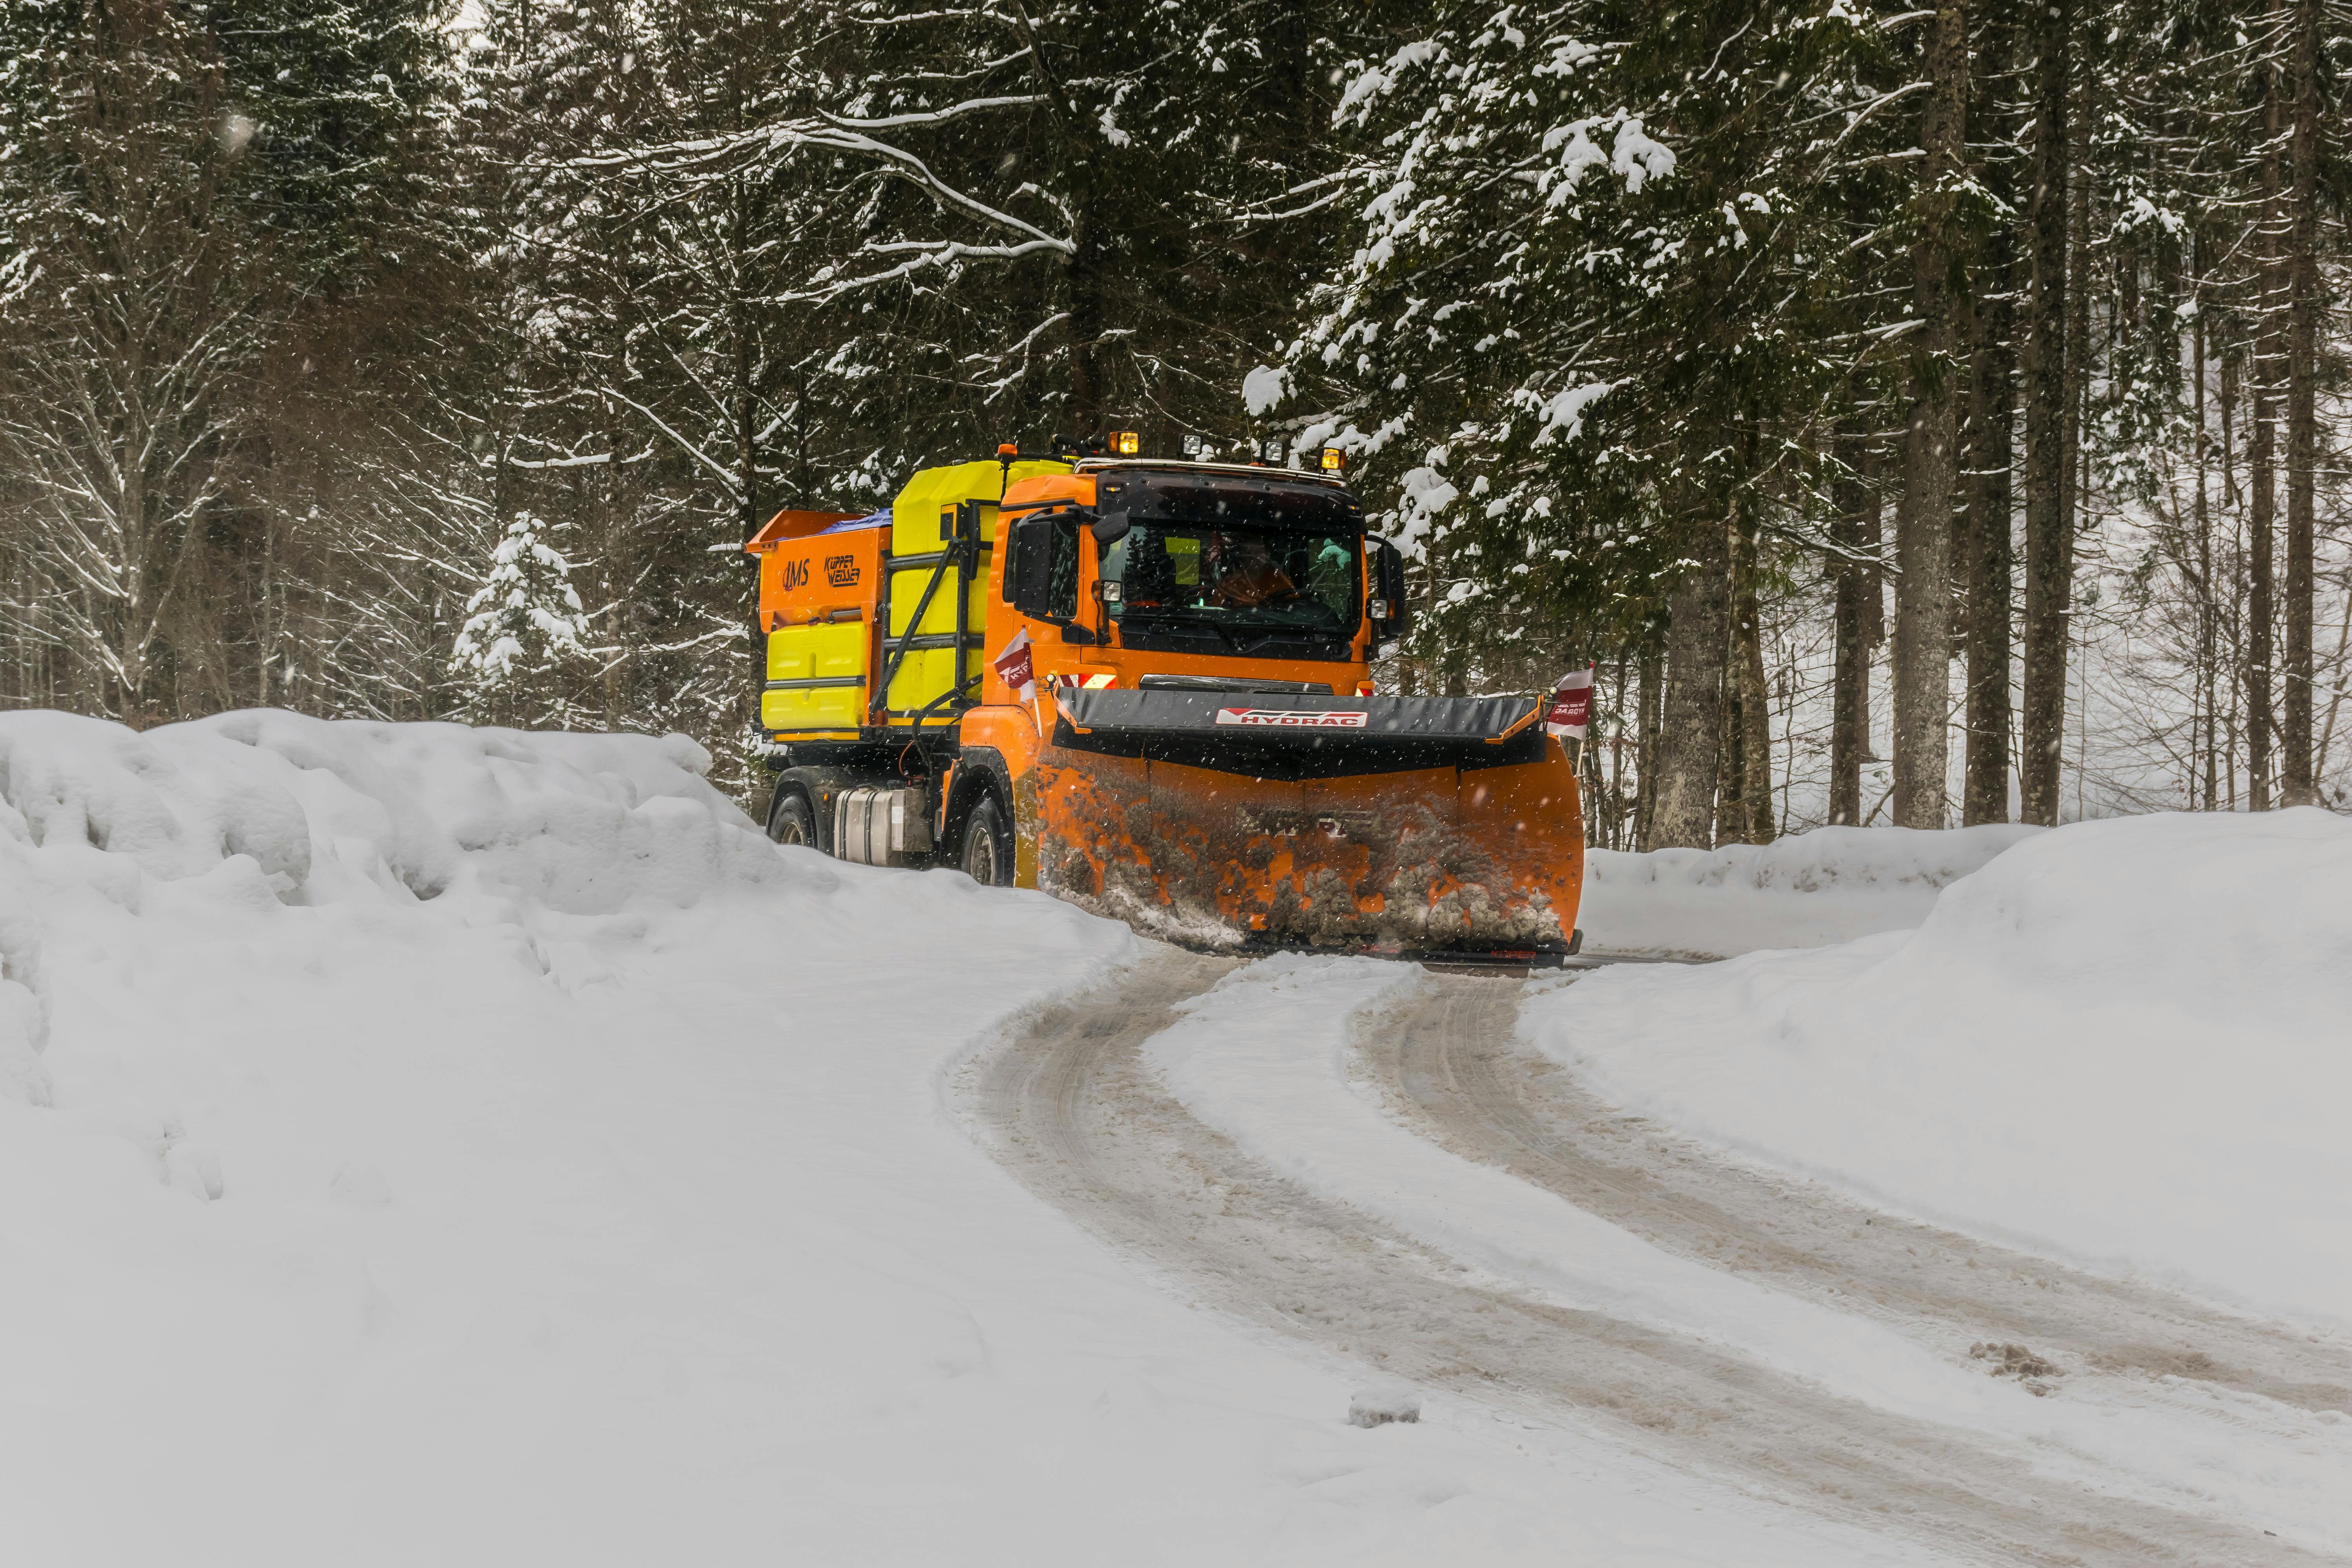
Free A snow plow clearing a snow-laden road through a forest in Ettal, Germany. Stock Photo


Here’s everything you need to know to make sure your snow plow is up to the task, plus a step-by-step inspection checklist to help you get it done.

Why Do You Need to Inspect Your Plow?

Taking a proactive approach to snow plow maintenance isn’t just about avoiding inconvenience when you start your truck, ready to plow at 5 AM- it’s the key to staying efficient and safe all season.

Here’s why investing time in a pre-season inspection is worth it:

1. Maximize Performance

A well-maintained plow guarantees you’re clearing snow efficiently. From raised driveways to narrow roads, you need a plow that can handle it all without any hiccups.

By making sure everything is functioning properly, from the hydraulics to the plow blade to the shoes, you’ll be able to tackle any plow job more effectively. Less guesswork, less tweaking, more snow-clearing.


2. Improve Safety

Winter conditions are unforgiving. Icy roads, low visibility, and long shifts create enough challenges without having to worry about a malfunction. Conducting regular inspections reduces the risk of breakdowns or injury when you’re using your plow.

No one wants to be stranded in the dark in below-freezing temps because of preventable issues. Inspecting brakes, hydraulic hoses, and mounting welds isn’t just good practice – it helps keep you (and everybody else) safe out there on the road.


3. Save Money

Repairing a plow mid-season is expensive. A loose fastener could easily snowball into a major issue if left unchecked (not to mention that some parts are a bit cheaper in the off-season than they are when you find yourself in a wintery pinch).

Regular checks can prevent costly damage or replacement of parts, making sure you get more mileage out of your equipment.

Plus, addressing rust early or making small mechanical adjustments could save hundreds – or potentially thousands – in repair bills down the line.


4. Long-Term Equipment Longevity

Snow plows are deliberately built tough because they have to handle tough conditions, but repeated impacts, exposure to salted roads, and extreme temperatures can take their toll over time.

Seasonal maintenance slows the aging process, extending the life of both your plow and your truck. If you take care of your equipment, it’ll take care of you.


5. Always Be Prepared

The last thing you want is to be caught off guard when the first snowstorm rolls in. A pre-season inspection ensures you’re ready to hit the ground running (or in this case, plowing).


Your Snow Plow Inspection Checklist: What to Watch For

Grab your gloves, a flashlight, some dielectric grease, and this checklist – it’s time to get your plow winter-ready.

1. Check Your Truck Battery, Wipers, Tires, and Brakes

Start with the essentials. Your truck’s battery should be fully charged, and the tires should have sufficient tread for icy roads. Inspect the wipers and make sure they’re clearing the windshield perfectly – snow visibility is key. Finally, give your brakes the green light so you can stop safely on slick surfaces.


2. Run Through the Functions of the Plow

Think of it as a dress rehearsal for your plow – test everything before your first snow.

Does the plow raise and lower smoothly? If you have a V-plow, make sure the wings extend and the blade pivots properly. Check the turn signals and beacon lights to make sure they’re working so you don’t have any surprises out there on the road.


3. Inspect the Fasteners

Fasteners keep everything connected, so they need to be tight. Use a torque wrench to check all mounting bolts and fasteners for proper torque. Replace any missing or rusty bolts.


4. Check Hydraulic Fluid Levels

Low hydraulic fluid is a common culprit for plow malfunctions. Top it off if needed and look for any leaks in the system that could cause you trouble later.


5. Inspect the Plow for Rust or Corrosion

Road salt and moisture are a nightmare combination when it comes to metal parts. Inspect your plow for rust and touch it up with paint if necessary. For long-term protection, consider using a powder coating to act as a durable shield against corrosion.


6. Inspect the Quick Couplers

Quick couplers should be clean and snap into place easily. Worn or damaged couplers can leak hydraulic fluid and affect plow performance.


7. Look at the Wiring

Check your electrical connections, paying close attention to wear points. Clean all connections thoroughly and apply dielectric grease to prevent breakdowns caused by moisture or salt.


8. Inspect the Plow Blade Edge and Shoes

The cutting edge of the plow is where the magic happens. Most manufacturers recommend replacing it if it’s less than 4 inches tall, has uneven wear, or is chipped.

Also, take some time to inspect the plow’s shoes and replace them if they’re worn.


9. Inspect the Springs

Inspect the plow’s trip springs for tension and any visible issues like cracks. Over time, they may weaken, requiring adjustment or replacement.


10. Check the Hose Assemblies

Hydraulic hoses are prone to wear, so inspect for any cracks, crimps, or leaks. Replace worn hoses before they fail mid-job.


11. Inspect the Clamps

Loose clamps can compromise the entire system. Make sure all clamps are securely holding hoses and wiring in place.


12. Make Sure Nothing is Loose

Give everything a final once-over. Tighten any loose bolts or connections to eliminate small issues before they become big ones.


13. Inspect the Welds in the Plow Structure and Vehicle Mount

Look for cracks or weaknesses in welds throughout the entire plow structure. Reinforce or repair any questionable welds to keep your plow working as designed.


14. Test the Headlamps

Confirm your headlamps are functioning and aligned properly. Poor lighting can make nighttime plowing more hazardous than it needs to be.


15. Make Sure Electric Plugs Have Dielectric Grease

Protect electrical plugs from moisture and corrosion by applying dielectric grease. It’s a quick, simple step to ensure reliable connections all season.


16. Stock Your Emergency Supplies

This last tip might not be directly related to your plow, but it’s a smart step for anybody who has a plow: make sure you stock up.

You should take a few moments to stock your vehicle with essentials like a shovel, emergency parts (hydraulic fluid, extra hoses, motor relay, etc.), a basic tool kit, and a flashlight. These items can save the day if something goes wrong (or at the very least, save you some time if and when you find yourself in a pinch).


How to Store Your Snow Plow for Next Year

When spring rolls around, don’t just park that plow and forget about it. Clean it thoroughly to remove salt and grime. Inspect it for wear and tear, touch up any paint, and store it in a dry, covered space.

For added protection, you should grease all moving parts and keep it elevated off the ground to prevent deforming the blade edge.

A little TLC at the end of the season makes next winter’s prep much easier – and will make next year’s pre-season inspection go by so much more quickly, too.

Preparing your snow plow before winter means making sure you’re ready for whatever comes your way.

By following this checklist, you’ll save time, money, and headaches all season long. Need replacement parts or emergency supplies? Stock up now to avoid last-minute scrambles. Visit the Hose and Fittings shop to find everything you need for a successful season of pushing snow!


FAQ

How do you maintain a snow plow?

Inspect your plow regularly for issues like rust, loose fasteners, and hydraulic leaks. Clean it after snow jobs to remove salt, grease moving parts, and replace worn parts when necessary.

How often should you change plow fluid?

Ideally, you should check and change your hydraulic fluid at least once a year, or more frequently if you use your plow heavily.

What do you spray on snow plow blades?

Anti-corrosion sprays or protectants can help prevent rust. Some also use WD-40 or specialized plow coatings.

How do you keep a plow from rusting?

Touch up paint and use powder coating to create a barrier. Wash your plow after every snow job to remove salty residue.


Relevant Link:
At HoseandFittings.com, we are dedicated to providing the best online customer service experience possible, complete with over 125,000 products cataloged for you. Our website has been designed with your needs in mind. You can quickly navigate through our departments with confidence and find the product you need to meet your requirements, with fast loading images and spec pages containing the details you need. HoseandFittings.com (HnF) was launched in 1999, created as an extension to the “bricks and mortar” company Power Components Corporation (PCC). Our goal is to help our consumers find the products they need at a price they can afford at HoseandFittings.com all from the convenience of their computer.
Facebook.png LinkedIN.pngGoogle.png

Leaf Removal Hacks: Harness the Power of Hose & Fittings this Fall

Leaf Removal Hacks: Harness the Power of Hose & Fittings this Fall

Ah, fall. The season of pumpkin spice, cozy sweaters…and a pile of moldy, mildewing leaves blanketing your lawn.

If you’re like most people, there’s a good chance that you spend hundreds of hours mowing, fertilizing, and aerating your lawn each year. You want it to look its best, but it can be frustrating to then spend hours raking only to find more leaves falling the next day. 

And if you decide to hire the service out? Sure, you’ll save time and energy, but you’re going to pay with your wallet. The average cost of leaf removal is between $285 and $500, or $390 on average (significantly more if you have a large lawn).

What if we told you there’s a better (and less back-breaking) way to harness the power of hoses and fittings to make leaf removal a breeze? We’ll dig into some of those ideas in this post – and show you how you can harness the power of hoses and fittings this fall – to make this dreaded autumn chore a bit less mundane.


Raking vs. Vacuuming: Choose the Best Method

Picture this: a crisp fall morning, a warm mug of coffee in your hands, and an ungodly pile of leaves waiting for you outside. 

So do you reach for your trusty rake or opt for a leaf vacuum? That’s the million-dollar (or million-leaf) question. 

Raking can be a great workout, but it’s also labor-intensive and time-consuming. The leaf vacuum is a game-changer if you want to reclaim your weekend (and save your back).

Leaf vacuums operate just as they sound. They use a powerful motor to create suction that draws in leaves and other debris. Once these items are collected, they’re shredded into smaller pieces by internal blades, which allows for more efficient collection. Then, the shredded leaves are deposited into an attached bag. 

Some models even offer a mulching feature, which can turn those problematic leaves into something that actually helps your lawn and garden – nutrient-rich mulch. 

The beauty of leaf vacuums is the time saving. With one of these, you can suck up leaves faster than you can say “pumpkin pie.” Even very basic, handheld leaf blowers (not larger capacity, more professional vacuums) are estimated to get the job done twice as fast as rakes.

They also offer a more thorough clean-up, reaching areas that are hard to reach (like corners and gutters). There’s less bending and lifting, too, a win for someone who’s tired of feeling like they’ve run a marathon after a day of yard work.

How to Get Rid of Leaves Quickly: 6 Hacks

The leaves are piling up, and you need to get rid of them before they start suffocating your lawn. Here are some tips to help you make quick work of the tedious task:

1. Come Up with a Game Plan

Tackling leaf piles without a plan is like going grocery shopping without a list – you’re going to end up with a mess and some unnecessary stress. 

Start by assessing your yard and identifying areas that collect the most leaves. Think about the layout and obstacles like flower beds or garden paths so you can tackle each section efficiently. It may also help to come up with a calendar or schedule for removal so you can stay ahead of leaf problems before they become problems.

2. Start Early and Do it Often

Procrastination is your enemy. When leaves become wet, they become heavier and more cumbersome (and again, begin to suffocate your yard). Start early in the day and early in the season, and make a plan to remove leaves often. This will prevent a massive pile-up and keep your yard looking pristine all season long.

3. Use the Right Equipment 

When you’re removing leaves, you need to have the right tools for the job. It doesn’t matter if you’re a homeowner with a postage stamp yard or a commercial landscaper maintaining hundreds of acres a year: investing in the right leaf vacuum and hose can make a world of difference.

There are all kinds of options out there, from small residential models to goliath commercial-grade vacuums. 

Look for one that meets your specific needs, and consider these factors: 

  • Materials: Opt for hoses made from durable materials like rubber or PVC, which can withstand constant usage and resist wear and tear.
  • Durability: Check for features like reinforced construction or abrasion-resistant coatings to make sure the hose can endure rough conditions and extended usage (regardless, make sure your gear is packed up and stored inside over the winter to avoid unnecessary wear and tear). 
  • Lengths: Measure the area to choose the right length. Obviously, longer hoses provide greater reach and flexibility, but you’ll want to make sure that the added length doesn’t compromise suction power.
  • Diameters: A larger diameter can reduce clogging and increase airflow, but it should still be compatible with your vacuum system.
  • Flexibility: Choose a hose that is flexible enough to maneuver around obstacles like shrubs and trees without any kinking or twisting.
  • Compatibility: Make sure the hose you select is compatible with your leaf vacuum model. Double-check the attachment fittings and specifications to avoid mismatches. This is arguably the most important component of your decision!

If you’re not sure what kind of hose to get for your leaf vacuum, consider reaching out to a company skilled in distributing and selling this kind of equipment. At Hose and Fittings, we sell – you guessed it – hoses and fittings for all kinds of applications, including leaf removal. Give us a shout and we can help you find a hose that matches your needs (and your vacuum’s specs) perfectly. 

4. Scout Your Yard for Mulch, Twigs, and Rocks Before You Start

Before you fire up your leaf vacuum, do a quick sweep of the yard for any debris. Watch out for mulch, twigs, or rocks of any size. 

While larger debris is inherently more problematic – it can clog your vacuum and lead to potential damage – even smaller items should be removed, as they’ll turn into airborne projectiles if they happen to get sucked up by the vacuum.

5. Wear Eye & Hearing Protection

Jumping off the last point, remember – safety first! Leaf vacuums have the potential to kick up a lot of debris, and also produce quite a bit of noise. 

Protect your eyes with safety goggles and your ears with earplugs or noise-canceling earmuffs. This might sound like a small, overly cautious step (especially if you’re just working on removing a few leaves), but it will keep you comfortable and safe while you’re working.

6. Have a Plan for Pick-Up or Disposal

Once the leaves are collected and corralled, you’ll need a way to get rid of them. Some people blow their leaves directly onto a tarp or into a bag for easy disposal. Leaf vacuums with bag attachments make this easy, but that’s not standard for every product.

Even if you just collect all your leaves into a pile, having a plan to get rid of them ahead of time is still smart. You can compost the leaves, mulch them, or simply bag them up and haul them away. Many communities offer curbside leaf collection or designated drop-off days, so don’t be afraid to take advantage of these services.

Ultimately, knowing what you are going to do ahead of time will save you the stress of having a wet, molding pile of leaves sitting on your lawn for weeks (which, of course, will likely need to be re-collected when the wind starts blowing them around). 

 Dealing with a never ending pile of leaves this fall?

Find out how you can harness the power of hoses and fittings this fall with our leaf removal hacks.


What is the Fastest Way to Get Rid of Leaves?

If speed and efficiency are what you’re after, then combining the hacks above with a well-chosen leaf vacuum and fitting system is your best bet. 

Imagine a setup where you can seamlessly switch between vacuuming and bagging, with hoses designed for maximum suction and minimal clogs. Investing in a high-quality hose that fits snugly with your vacuum (ideally, one selected using the tips we mentioned above), will exponentially increase your leaf-clearing speed, leaving more time for hot cider and curling up by a bonfire.

At Hose and Fittings, we offer components that are engineered to handle a variety of environmental conditions. We’ll make sure you’re prepared for whatever Mother Nature throws your way. You can tailor your options to meet your exact needs, whether you’re tidying up a small yard or managing a sprawling estate.

After all, leaf removal doesn’t have to be a tedious, overwhelming task. By choosing the right tools – and employing a few strategic hacks – you can transform your autumn ritual into a quick, efficient process (perhaps something you actually begin to enjoy). 

Reach out to Hose and Fittings today to find the gear you need – and take time to enjoy this most beautiful season of change.

Relevant Link: 

Why You Need to Winterize Your Irrigation Systems

Winter is coming, and while Jon Snow might be worried about White Walkers, you should probably be more concerned about your irrigation system and hoses. 

For home and business owners alike, this season can wreak havoc on your irrigation setup if it’s not properly winterized. 

Keep reading to discover why winterizing is so important, when to do it, and how to make sure your irrigation system and hoses are ready for the colder months ahead.

Why You Need to Winterize Your Irrigation Systems

Did you know that improperly winterized irrigation systems can lead to burst pipes and costly repairs? According to data, these repairs can range from a few hundred to several thousand dollars. That’s a hefty price to pay for something that can be easily avoided. 

Just imagine waking up one winter morning to find a burst pipe flooding your property. Not only does this disrupt your daily operations, but it also results in expensive emergency repairs. 

Winterizing your system helps you avoid frozen pipes, burst valves, and damaged sprinkler heads. By taking the time to winterize now, you’ll save yourself from these common winter woes and make sure your system is in top shape come spring.

When Should You Winterize Your Irrigation Systems?

Picture this: it’s early November, and the weather forecast predicts a hard freeze in the next few days. You haven’t winterized your irrigation system yet, and panic sets in.

Timing is everything. The best time to winterize your irrigation system is before the first hard freeze of the season. For most regions, this is usually late October to early November. 

However, there’s really no one-size-fits-all. You need to keep an eye on the weather forecast and plan accordingly.

If you’re late to the game, don’t worry. It’s better to winterize late than not at all. Even if you’re running a bit behind schedule, taking the time to winterize can still save you from potential disasters. Just remember, earlier is always better, as it gives you ample time to address any issues that may arise during the process.

What Does Winterizing an Irrigation System Involve?

One of the most important techniques for winterizing is the “blowout” method. This involves using compressed air to remove all the water from the irrigation pipes. 

Most residential and small commercial irrigation systems can’t handle more than 40-60 psi. Using a portable air compressor that exceeds this can cause damage. 

Always use a pressure regulator after the service valve to keep the pressure within safe limits. This makes sure that the air pressure is just right for expelling water without causing any harm to your system.

Then, here are the steps to follow:

  1. Shut off the main water supply to the system. This prevents any new water from entering the pipes during the blowout process.
  2. Attach the air compressor to the blowout port. This is where you’ll introduce the compressed air into the system.
  3. Gradually increase the air pressure to start expelling water from the system. Patience is key here; rushing through the blowout can leave water in the pipes, which defeats the purpose of winterizing.
  4. Move through each zone one at a time until all water is blown out. Thoroughly check each zone to ensure no water remains.

How Long Do Blow Outs Take?

The duration of the winterizing process depends on the size of your irrigation system. For a typical residential system, it can take anywhere from 30 minutes to an hour. Larger commercial systems might take several hours. 

Make sure you allocate enough time to do the job properly. Rushing through the winterizing process might result in missed zones or incomplete blowouts, leaving water trapped in the pipes. This can lead to frozen water expanding and causing pipes to burst. 

You’ll know the job is done when there’s:

  • No water misting from the sprinkler heads when using the air compressor.
  • Consistently low air pressure readings.
  • Drained backflow preventers and valves.

Double-checking now can save you headaches later. Imagine thinking your system is fully winterized, only to discover a hidden pocket of water that leads to a burst pipe. Thoroughly inspecting each zone and ensuring all water is expelled guarantees that your irrigation system will survive the winter unscathed.

Other Steps for Winterization

If you’re not following the blow-out method, you can use manual or automatic drain valves to remove any remaining water. You’ll also want to take steps to protect the controller by setting it to the “off” position. Some advanced systems have a “rain mode” which essentially does the same thing without turning off the timer settings.


Don’t forget to insulate any exposed pipes, too. You can wrap them with insulation tape or foam. This provides an extra layer of protection against freezing temperatures. Don’t forget the backflow preventer – this component is particularly vulnerable.


Detach hoses from outdoor faucets, drain any remaining water, and store them in a dry, sheltered place. This prevents them from becoming brittle and cracking in the cold. 


Your work isn’t done yet! You also need to take some time to inspect your hoses, which we’ll describe in more detail below.

Fall Hose Inspections: What to Look For

While winterizing your irrigation system is essential, don’t forget about your hoses. Fall hose inspections can prevent costly damage and ensure your hoses are ready for the next watering season. 


Here’s what to look for during your inspections:

Check for Leaks and Cracks

Inspect your hoses for any leaks or cracks. Even small pinholes can lead to significant water loss and reduced efficiency. 


If you find any damage, consider replacing the hose or using hose repair kits to patch up the problem areas. A leaky hose can waste precious water and increase your utility bills, so addressing leaks promptly is crucial.

Examine Hose Connections

Make sure that all hose connections are secure and free from leaks. Loose connections can result in water wastage and reduced water pressure. 


Tighten any loose fittings and replace worn-out washers to maintain a reliable and efficient hose system. Properly connected hoses help water flow smoothly and efficiently, without any leaks.

Test Hose Flexibility

Check the flexibility of your hoses. Cold temperatures can cause hoses to become brittle and prone to cracking. If you find that your hoses are already stiff or inflexible, consider storing them indoors during the winter months to prolong their lifespan. 


Flexible hoses are less likely to crack under pressure, ensuring a longer-lasting and more reliable watering system.

Get Help This Fall from Hose and Fittings

Don’t wait until it’s too late – take action this fall and enjoy peace of mind knowing that your irrigation system and hoses are in top shape all winter long.

Remember, winterizing your irrigation system and inspecting your hoses are essential tasks to ensure the longevity and efficiency of your watering setup. However, these tasks can be time-consuming and require specialized knowledge and equipment. 

That’s where Hose and Fittings comes in.

We’re here to help you every step of the way when you’re searching for the right irrigation equipment and hoses –  and we want to make sure that your system is ready to perform flawlessly in the spring. 

Invest in the longevity and efficiency of your irrigation setup and enjoy a worry-free winter season – winterize your system now, and settle in for the colder months ahead. 

What is a NPSM Thread and How Does it Work

What is a NPSM Thread and How Does it Work?

If you want to ensure the smooth operation and safety of your equipment, it
goes without saying that you need to have the right components. After all,
if you’re working in an industry where every detail counts – as so many of
us are – you need to make sure you explore each and every technical aspect.

A common question asked here at Hose and Fittings is, “what is a NPSM
thread?”

In this post, we’ll explain the NPSM and NPT meaning – and break down the
differences between the two for you as well.

What is NPSM Thread?

NPSM, which stands for National Pipe Straight Mechanical thread, follows a
standardized threading pattern, much like its cousin, NPT (National Pipe
Thread).

However, NPSM threads are unique due to their straight-grain, non-tapered
design, which distinguishes them from the conical profile of NPT threads.

NPSM is the American standard for threads used on fittings and pipes in
plumbing and specific mechanical applications. NPSM threads, again, are
straight threads designed to create a seal through the use of a gasket or
washer rather than relying on the threads themselves for sealing. These
threads most often tend to be found in fluid handling systems where a tight,
leak-resistant connection is absolutely essential.

What Are Some Common NPSM Thread Characteristics? Here are a few more
characteristics (and benefits) of NPSM threads to pay attention to:

Straight-Grain Design and Versatility

An NPSM thread’s straight-grain design allows for easy installation and
removal, typically requiring fewer turns than NPT threads, leading to
quicker assembly.

This characteristic makes NPSM threads suitable for applications that call
for a quick, convenient connection without necessitating an extensive
sealing process.

Ideal for Low-Pressure Systems

NPSM threads’ sealing performance is not as robust as NPT threads, as their
design doesn’t lend itself to creating a high-pressure seal. This makes NPSM
threads excellent for low-voltage, non-exacting applications such as
lighting fixtures, domestic appliances, and non-critical mechanical
connections.

Widespread Application

Despite their reduced sealing capability, NPSM threads have a significant
presence across various sectors.

Whether it’s lighting or home appliances, mechanical connections, or certain
low-pressure pipeline applications, the NPSM thread is there to help,
offering a route to establishing connections that are efficient and adequate
for their specific contexts.

Where is NPSM Thread Used?

So what settings might NPSM thread be useful for?

To start, they’re common in the lighting industry, where they offer a sturdy
installation as well as a safe, reliable electrical joint.

They can also be used in household equipment. Whether in faucets, bathroom
fixtures, or home appliances, NPSM threads serve as the unobtrusive link to
connect different components within equipment.

Mechanical engineering benefits extensively from the utility of NPSM
threads, too. These play a crucial role in connecting pipes, valves, and
sensors.

Finally, in industrial settings, NPSM threads are a common sight. They’re a
key part of the compressed air systems, cooling installations, and all kinds
of industrial piping setups. They offer some level of convenience while also
still meeting the stringent sealing requirements of certain applications –
truly, the best of both worlds.

What is the Difference Between NPSM and NPT? When it comes to the difference
between NPSM and NPT, the devil truly is in the details.

The most recognizable difference between the two lies in the thread’s taper.
NPT threads feature a tapered design for enhanced sealing, especially in
high-pressure applications, while NPSM threads are straight-grained and
suitable for low-pressure systems.

There’s also some differences in how they’re installed. Because of their
respective designs, NPT threads demand more turns during the installation
process to ensure a tight, effective seal,

whereas NPSM threads achieve the ideal connection with significantly fewer
turns because of the straight-grain texture.

In high-pressure or high-sealing scenarios, NPT threads reign supreme due to
their sealing capabilities. NPSM threads aren’t as ideal for these
situations, but can perform just fine in settings that don’t require
extensive sealing.

Finally, NPT threads are ideal for gas and liquid transmission systems, as
well as pipe connections and, as mentioned earlier, other high pressure
applications. NPSM threads are better for applications that don’t involve
high pressure, like lamps and household equipment.

Choosing the Right Pipe Threading

Deciding whether to use NPSM or NPT threads isn’t necessarily a matter of
personal preference, but of the task at hand. There are a few factors you’ll
want to consider when deciding which is best.

First, you need to understand the level of pressure and the sealing
requirements of the job at hand. If you’re working on a high-pressure
system, NPT is ideal. If it’s a low-pressure system where ease of assembly
is a top priority, go for NPSM.

If you’re on the hunt for a thread that offers exceptional sealing and a
longer lifespan for your equipment, NPT might be the better choice, but if
you value quick, hassle-free connections, NPSM will be the way to go.

Ultimately, you’ll want to keep close tabs on industry standards and the
thread types most commonly used in your sector. This can help you streamline
your supply chain and maintenance processes. Assess the availability of
fittings with your chosen threading type, too – some of this decision might
end up hinging on supplier and market viability.

Still can’t decide? Don’t be afraid to reach out for help. Here at Hose and
Fittings, we’re happy to answer any questions you have to make sure you find
the perfect fit on a case-by-case basis. Whether it’s NPSM, NPT, or any
other acronym you have questions about, it would be our pleasure to help
walk you through the process.

Check out our selection today!

Enhancing Agricultural Operations with Reliable Hose Clamps

Enhancing Agricultural Operations with Reliable Hose Clamps

Agriculture has always been the backbone of our economy, and right at the heart of it is innovation driving it forward. 

It's not always about big breakthroughs or the latest flashing, shiny gadgets, either. In fact, did you know most irrigation systems rely on hose clamps for their functionality and efficiency? 

The humble hose clamp is essential in guaranteeing smooth operations on the farm. 

For an industry where reliability matters perhaps more than any others, we'll explore the importance of reliable hose clamps in agriculture, the different types available, and how to choose the best ones for your needs. 

Why Reliable Hose Clamps Are a Must for the Ag Industry 

You might be surprised to hear that the global hose clamps market is expected to reach $3145.11 million in 2031. How could something so small be so important? 

The quick answer: they're incredibly versatile, and incredibly valuable. Here are three reasons why hose clamps are a must in the ag industry. 

Offering Efficient Irrigation 

We all know the role irrigation plays in producing healthy crops. 

Hose clamps are indispensable in securing fittings and fastening irrigation pipes. They prevent water waste and provide a steady flow of water to your crops. Imagine trying to irrigate your fields without secure connections – it's a disaster (and an expensive one at that) waiting to happen! 

Securing Hoses Between and Around Machinery 

Equipment like crop-sprayers, slurry spreaders, and seed drills also rely on high-performance hose clamps to keep them working properly. 

Tractor-mounted crop sprayers, for instance, tend to feature several hoses that are attached to a boom arm…by none other than hose clamps. Certain designs of slurry spreaders, too, include a sequence of hoses that are secured to a main hose from a tank. Hose clamps play a pivotal role in securing those hoses in place. 

Seed drills also require hose clamps, as the seeds go into a large hopper before they're

channeled down to the ground through a series of hoses – all secured, as you might guess, with hose clamps. 

Reducing Downtime and Costs 

On a broader scale, it's important to remember that agricultural equipment needs continuous reliability. 

Downtime can halt production and cost money, especially during time-sensitive activities like seasonal harvesting. Reliable hose clamps help avoid breakdowns, saving you time and money. It's all about keeping your farm running smoothly and efficiently. 

Enhancing Safety 

Similarly, fully secured components reduce the likelihood of accidents. Loose connections can lead to leaks, equipment damage, or even injuries. Using the right hose clamps helps everything stay in place, minimizing risks and helping keep your farm safe for everyone. 

Are All Hose Clamps the Same? 

The short answer is that no, not all hose clamps are made the same. As we started explaining above, hose clamps are indispensable in the agricultural industry, but some play a bigger role than others (namely, stainless steel ones). 

Breaking things down a little further, there are a few other categories to consider as you search for the right fit for your farm. 

Worm gear clamps are the most popular and arguably the most versatile. They come with a metal band and a screw mechanism, making them easy to tighten around hoses. They're great for general use and provide a secure connection. 

These clamps are perfect for securing irrigation pipes in your greenhouse, for example, offering a leak-free watering system. 

T-bolt clamps are equally durable and feature a bolt or two that tightens around the hose for a robust seal. They're ideal for high-pressure applications where a strong hold is necessary, like when you need to seal a liquid or air connection on hoses. 

You can use these clamps for heavy-duty machinery or high-pressure irrigation systems to prevent leaks and maintain system integrity. 

Other Types of Agricultural Hose Clamps 

Here are a few more types of hose clamps you might encounter:

● Spiral ClampsDesigned for more specific tasks, spiral clamps provide a secure grip and excellent resistance to vibration.They can be used around machinery hoses where vibration could otherwise cause wear or disconnection. 

● Band ClampsBand clamps offer a wide, even band of clamping pressure, which is helpful for distributing force over a larger surface area.They're excellent for securing larger diameter hoses on things like tanks and silos. 

● Oetiker Clamps: These high-precision stainless steel clamps provide a semi-permanent, tamper-proof seal. They're ideal for hydraulics and oil and gas applications. 

● Mini Clamps: Smaller in size but not in utility, mini clamps are perfect for more delicate applications, like securing small tubing or lines in greenhouse or sugaring operations where space is at a premium. 

● Pinch Clamps: Offering a fast, secure connection with minimal effort, pinch clamps are frequently used in quick connect-disconnect situations in farm maintenance tasks (as well as for things like fuel lines). 

● Bolt ClampsBolt clamps are heavy-duty and adjustable, able to secure large hoses connected to water pumps or fertilizer sprayers. 

● Loop Clamps: Loop clamps are excellent for securing and guiding cables or hoses along walls or surfaces; they can keep irrigation and electrical lines out of harm's way. They can also be used to secure light weights, on vacuum hoses, and to secure hoses around fittings. 

● V Band Clamps: V band clamps offer a quick-release option for secure and adjustable connections.They're particularly helpful for machinery that requires frequent maintenance or component swaps. 

● Muffler ClampsThese clamps are designed to secure exhaust systems in different types of machinery, like tractors. 

Call Us for Specialty Hose Clamps 

Sometimes, you need something a bit more out-of-the-box. Specialty hose clamps cater to unique requirements, such as unusual sizes or specific materials. 

For example, if you have a custom-built irrigation system, you might need specialty clamps to fit non-standard hoses and ensure a secure connection. If you're not sure what, exactly, you need, be sure to give us a call here at Hose and Fittings, as we may be able to help you find the perfect fit. 

Which Hose Clamps Are the Best? 

You might have your favorite tool on the farm, but let's face it – there's probably no single tool that's more important than the rest. Similarly, there's no single best hose clamp. It all comes to finding the right tool for the job. At Hose and Fittings, we're happy to have a conversation with you to help you find the right hose clamp for your needs.

In general, there are a few variables you'll want to consider. First is the material. Stainless steel clamps are ideal for wet environments. They're also a bit better for working with corrosive materials like liquid fertilizers, pesticides, and slurry. For less demanding applications, galvanized steel clamps might suffice. 

You also need to make sure you choose the right size and fit for your hoses. A clamp that's too small won't secure the hose properly, while one that's too large might not provide a tight seal. Before shopping, make sure you measure your hoses accurately and check manufacturer guidelines to select the perfect clamp size. 

At the end of the day, hose clamps might seem like a small component, but they play a critical role in maintaining irrigation systems, ensuring machinery operates smoothly, and enhancing overall farm safety. 

Are you ready to say goodbye to leaks, breakdowns, and inefficiencies? The right hose clamps can help. Don't let small issues turn into big problems. Instead, explore our top quality hose clamps now and boost your farm's productivity like never before

Safety First-The Importance of Inspecting and Replacing Hydraulic Lines

Safety First-The Importance of Inspecting and Replacing Hydraulic Lines

Hydraulic systems might seem like minor details, operating behind the scenes – but the reality is that they’re the backbone of countless industrial and construction operations, powering everything from heavy machinery to more intricate manufacturing processes.

But the very systems that boost efficiency and productivity (thereby making your job so much easier) can also pose significant risks if they’re not properly maintained. In this post, we’ll take a closer look at why inspecting and replacing hydraulic lines is so important.

These are must-read tips for anyone, at any time, and in any industry, but we underscore their importance in June, which is National Safety Month in the US.

So whether you’re an equipment operator, an industrial maintenance technician, or even a CEO, you can do your part to recognize the importance of hydraulic maintenance for safety this June by taking the time to read this guide.

Why Is Inspecting and Replacing Hydraulic Lines Important?

Hydraulic systems are the lifeblood of many industrial and construction operations. They’re powerful, efficient, and reliable – but only if they’re well-maintained. A compromised hydraulic line is dangerous for everyone, from operators to bystanders and even equipment.

Here’s why it’s so important:

Safety Risks

A leaking hydraulic line can create slippery surfaces, leading to accidents or injuries. Imagine working on a wet surface where every step could lead to a fall – definitely not something you want to subject yourself (or your employees) to.

Not only that, but hydraulic fluid is often pressurized. A sudden equipment failure caused by a leak can result in unexpected malfunctions and put your team in harm’s way. The consequences can be severe, including burns from high-temperature fluid or skin irritation from fluid additives.

Remember, hydraulic systems can operate at temperatures exceeding 200°F and pressures ranging from 2,000 to 10,000 PSI. Cracking a fitting or dealing with old, brittle hoses that burst can result in fluid sprays that end up causing severe injuries.

Injuries also occur because of improper repairs or the lack of adequate preventative maintenance (PM) procedures. Workers have suffered severe consequences from equipment failure due to neglected hydraulic lines.

Equipment Damage

Beyond human safety, neglecting hydraulic line leaks can lead to extensive equipment damage over time. Unattended leaks stress the system, potentially leading to component failures or entire system breakdowns. The cost of such repairs often far exceeds the expense of fixing a leaky line early on.

Both stationary industrial equipment and mobile construction machinery rely on hydraulic systems. Neglecting maintenance can cause these systems to fail, and the cost of replacing or repairing them is significantly higher than the cost of regular inspections and timely replacements.

Electrical Hazards

Another concern is the interaction between hydraulic systems and electrical components.

Accidental contact with live wires or improper grounding can cause electrical shocks or fires. The stored energy within hydraulic systems only adds to the substantial risks.

Pinhole Leaks

Pinhole leaks in hydraulic lines can also be dangerous. Pressurized hydraulic fluid can forcefully escape through small openings, resulting in fluid injection injuries, burns, and other hazards.

Immediate action to relieve hydraulic pressure and repair leaks is crucial, but it’s even better to inspect and replace lines before they reach this point.

Unexpected Release of Pressure

Understanding the risks associated with removing or adjusting components in hydraulic systems is just as vital. Working with pressurized hydraulic equipment can be very dangerous. Components like valves, connectors, or hoses might unexpectedly release hydraulic pressure, causing sudden movements or injuries.

Before removing or adjusting any parts, it’s essential to relieve hydraulic pressure and follow all safety protocols.

When Should You Inspect Your Hydraulic Hoses?

Now, you hopefully know that regular inspection is key to maintaining the safety and efficiency of hydraulic systems. But how often should you inspect your hoses?

While the exact timeline will probably vary depending on your industry and the frequency of use, here is a good general schedule to follow:

     Daily: A quick visual check for obvious signs of wear, leaks, or damage.

     Weekly: A more thorough inspection, including checking connections and ensuring there are no signs of wear and tear.

     Monthly: A comprehensive inspection, including pressure testing and checking for pinhole leaks.

Tips for Safely Inspecting and Replacing Hydraulic Hoses

When it comes to safely inspecting and replacing hydraulic hoses, there are several helpful tips you’ll want to keep in mind.

First and foremost, always make sure that the machinery is turned off and properly isolated before beginning any maintenance work. This step can prevent the accidental exposure to high-pressure fluids that have the ability to cause serious injuries.

Next, visually inspect the hoses for signs of wear and tear, such as cracks, abrasions, or leaks. Pay close attention to the hose fittings and connectors, as these areas are prone to damage. It’s also important to check for any kinks or twists in the hose, which can compromise its performance and safety.

After inspecting, if you find any damage or other potential issues, replace the hose immediately. Always use the manufacturer-recommended replacement hoses and fittings to ensure compatibility and reliability. When you’re installing new hoses, make sure they’re routed correctly to avoid sharp bends and contact with moving parts, which can lead to premature failure.

Remember, the key takeaway here is that regularly scheduled maintenance and inspections should be part of your routine. This can help you catch potential problems early and extend the lifespan of your hydraulic systems.

When you carry out this maintenance, be sure to properly document all inspections and replacements – that way, you can track the history and performance of your equipment over time.

Routine Inspections Provide Optimal Performance

When it comes to maintaining the efficiency and safety of your hydraulic systems, there’s truly no substitute for regular inspections. These need to be scheduled and conducted at consistent intervals and tailored to the specific needs and usage of the system.

During each inspection, focus on identifying signs of wear and tear, verifying the integrity of seals and hoses, and making sure fluid levels are adequately maintained.

By adhering to a routine inspection schedule, you can identify and address potential issues before they escalate – and in doing so, hopefully extend the lifespan of the system and prevent costly downtime.

Inspecting and replacing hydraulic lines isn’t just about maintaining equipment – it’s about safeguarding your team.

Ready to take your hydraulic maintenance to the next level? Browse the Hose and Fittings catalog for a wide range of hydraulic components and feel free to reach out with any questions. We’ll help you find the information and supplies you need to keep everyone safe – and your equipment functioning exactly as it should.

FAQ

What are the safety precautions that need to be taken when working with hydraulic systems?

Always remember to follow safety protocols like using insulated tools, proper lockout/tagout procedures, and making sure everything is well grounded to steer clear of any electrical mishaps.

What should be inspected for in hydraulic lines?

During inspections of hydraulic lines, keep an eye out for leaks, wear and tear, damage, or any signs of deterioration to identify and address potential issues early and to keep your system running smoothly.

How often should hydraulic lines be replaced?

The frequency of replacing hydraulic lines can vary based on factors like usage, environmental conditions, and manufacturer recommendations, but as a rule of thumb, consider replacement if you spot significant wear or damage during routine checks.

How often should hydraulic hoses be inspected?

For optimal performance, try to inspect hydraulic hoses every three to six months, adjusting the frequency based on usage and environmental factors (more often than every three months doesn’t hurt, either). This will help you catch any potential issues early on and extend the lifespan of your hydraulic system.

Enhancing Agricultural Operations with Reliable Hose Clamps

Agriculture has always been the backbone of our economy, and right at the heart of it is
innovation driving it forward.


It’s not always about big breakthroughs or the latest flashing, shiny gadgets, either. In fact, did
you know most irrigation systems rely on hose clamps for their functionality and efficiency?

The humble hose clamp is essential in guaranteeing smooth operations on the farm.

For an industry where reliability matters perhaps more than any others, we’ll explore the
importance of reliable hose clamps in agriculture, the different types available, and how to
choose the best ones for your needs.

Why Reliable Hose Clamps Are a Must for the Ag Industry

You might be surprised to hear that the global hose clamps market is expected to reach
$3145.11 million in 2031. How could something so small be so important?

The quick answer: they’re incredibly versatile, and incredibly valuable. Here are three reasons
why hose clamps are a must in the ag industry.

Offering Efficient Irrigation

We all know the role irrigation plays in producing healthy crops.

Hose clamps are indispensable in securing fittings and fastening irrigation pipes. They prevent
water waste and provide a steady flow of water to your crops. Imagine trying to irrigate your
fields without secure connections – it’s a disaster (and an expensive one at that) waiting to
happen!

Securing Hoses Between and Around Machinery

Equipment like crop-sprayers, slurry spreaders, and seed drills also rely on high-performance
hose clamps to keep them working properly.
Tractor-mounted crop sprayers, for instance, tend to feature several hoses that are attached to
a boom arm…by none other than hose clamps. Certain designs of slurry spreaders, too,
include a sequence of hoses that are secured to a main hose from a tank. Hose clamps play a
pivotal role in securing those hoses in place.
Seed drills also require hose clamps, as the seeds go into a large hopper before they’re

channeled down to the ground through a series of hoses – all secured, as you might guess, with
hose clamps.

Reducing Downtime and Costs

On a broader scale, it’s important to remember that agricultural equipment needs continuous
reliability.


Downtime can halt production and cost money, especially during time-sensitive activities like
seasonal harvesting. Reliable hose clamps help avoid breakdowns, saving you time and money.
It’s all about keeping your farm running smoothly and efficiently.

Enhancing Safety

Similarly, fully secured components reduce the likelihood of accidents. Loose connections can
lead to leaks, equipment damage, or even injuries. Using the right hose clamps helps everything
stay in place, minimizing risks and helping keep your farm safe for everyone.

Are All Hose Clamps the Same?

The short answer is that no, not all hose clamps are made the same. As we started explaining
above, hose clamps are indispensable in the agricultural industry, but some play a bigger role
than others (namely, stainless steel ones).


Breaking things down a little further, there are a few other categories to consider as you search
for the right fit for your farm.


Worm gear clamps are the most popular and arguably the most versatile. They come with a
metal band and a screw mechanism, making them easy to tighten around hoses. They’re great
for general use and provide a secure connection.

These clamps are perfect for securing irrigation pipes in your greenhouse, for example, offering
a leak-free watering system.

T-bolt clamps are equally durable and feature a bolt or two that tightens around the hose for a
robust seal. They’re ideal for high-pressure applications where a strong hold is necessary, like
when you need to seal a liquid or air connection on hoses.

You can use these clamps for heavy-duty machinery or high-pressure irrigation systems to
prevent leaks and maintain system integrity.

Other Types of Agricultural Hose Clamps

Here are a few more types of hose clamps you might encounter:

  • Spiral Clamps: Designed for more specific tasks, spiral clamps provide a secure grip and excellent resistance to vibration. They can be used around machinery hoses where vibration could otherwise cause wear or disconnection.
  • Band Clamps: Band clamps offer a wide, even band of clamping pressure, which is helpful for distributing force over a larger surface area. They’re excellent for securing larger diameter hoses on things like tanks and silos.
  • Oetiker Clamps: These high-precision stainless steel clamps provide a semi-permanent, tamper-proof seal. They’re ideal for hydraulics and oil and gas applications.
  • Mini Clamps: Smaller in size but not in utility, mini clamps are perfect for more delicate applications, like securing small tubing or lines in greenhouse or sugaring operations where space is at a premium.
  • Pinch Clamps: Offering a fast, secure connection with minimal effort, pinch clamps are frequently used in quick connect-disconnect situations in farm maintenance tasks (as well as for things like fuel lines).
  • Bolt Clamps: Bolt clamps are heavy-duty and adjustable, able to secure large hoses connected to water pumps or fertilizer sprayers.
  • Loop Clamps: Loop clamps are excellent for securing and guiding cables or hoses along walls or surfaces; they can keep irrigation and electrical lines out of harm’s way. They can also be used to secure light weights, on vacuum hoses, and to secure hoses around fittings.
  • V Band Clamps: V band clamps offer a quick-release option for secure and adjustable connections. They’re particularly helpful for machinery that requires frequent maintenance or component swaps.
  • Muffler Clamps: These clamps are designed to secure exhaust systems in different types of machinery, like tractors.
Call Us for Specialty Hose Clamps

Sometimes, you need something a bit more out-of-the-box. Specialty hose clamps cater to
unique requirements, such as unusual sizes or specific materials.


For example, if you have a custom-built irrigation system, you might need specialty clamps to fit
non-standard hoses and ensure a secure connection. If you’re not sure what, exactly, you need,
be sure to give us a call here at Hose and Fittings, as we may be able to help you find the
perfect fit.

In general, there are a few variables you’ll want to consider. First is the material. Stainless steel
clamps are ideal for wet environments. They’re also a bit better for working with corrosive
materials like liquid fertilizers, pesticides, and slurry. For less demanding applications,
galvanized steel clamps might suffice.


You also need to make sure you choose the right size and fit for your hoses. A clamp that’s too
small won’t secure the hose properly, while one that’s too large might not provide a tight seal.
Before shopping, make sure you measure your hoses accurately and check manufacturer
guidelines to select the perfect clamp size.

At the end of the day, hose clamps might seem like a small component, but they play a critical
role in maintaining irrigation systems, ensuring machinery operates smoothly, and enhancing
overall farm safety.

Are you ready to say goodbye to leaks, breakdowns, and inefficiencies? The right hose clamps
can help. Don’t let small issues turn into big problems. Instead, explore our top quality hose
clamps now and boost your farm’s productivity like never before.

Safety First, The Importance of Inspecting and Replacing Hydraulic Lines

Hydraulic systems might seem like minor details, operating behind the scenes – but the reality is
that they’re the backbone of countless industrial and construction operations, powering
everything from heavy machinery to more intricate manufacturing processes.

But the very systems that boost efficiency and productivity (thereby making your job so much
easier) can also pose significant risks if they’re not properly maintained. In this post, we’ll take a
closer look at why inspecting and replacing hydraulic lines is so important.

These are must-read tips for anyone, at any time, and in any industry, but we underscore their
importance in June, which is National Safety Month in the US.

So whether you’re an equipment operator, an industrial maintenance technician, or even a CEO,
you can do your part to recognize the importance of hydraulic maintenance for safety this June
by taking the time to read this guide.

Why Is Inspecting and Replacing Hydraulic Lines Important?

Hydraulic systems are the lifeblood of many industrial and construction operations. They’re
powerful, efficient, and reliable – but only if they’re well-maintained. A compromised hydraulic
line is dangerous for everyone, from operators to bystanders and even equipment.
Here’s why it’s so important:

Safety Risks

A leaking hydraulic line can create slippery surfaces, leading to accidents or injuries. Imagine
working on a wet surface where every step could lead to a fall – definitely not something you
want to subject yourself (or your employees) to.
Not only that, but hydraulic fluid is often pressurized. A sudden equipment failure caused by a
leak can result in unexpected malfunctions and put your team in harm’s way. The consequences
can be severe, including burns from high-temperature fluid or skin irritation from fluid additives.
Remember, hydraulic systems can operate at temperatures exceeding 200°F and pressures
ranging from 2,000 to 10,000 PSI. Cracking a fitting or dealing with old, brittle hoses that burst
can result in fluid sprays that end up causing severe injuries.
Injuries also occur because of improper repairs or the lack of adequate preventative
maintenance (PM) procedures. Workers have suffered severe consequences from equipment
failure due to neglected hydraulic lines.

Equipment Damage

Beyond human safety, neglecting hydraulic line leaks can lead to extensive equipment damage
over time. Unattended leaks stress the system, potentially leading to component failures or
entire system breakdowns. The cost of such repairs often far exceeds the expense of fixing a
leaky line early on.
Both stationary industrial equipment and mobile construction machinery rely on hydraulic
systems. Neglecting maintenance can cause these systems to fail, and the cost of replacing or
repairing them is significantly higher than the cost of regular inspections and timely
replacements.

Electrical Hazards

Another concern is the interaction between hydraulic systems and electrical components.
Accidental contact with live wires or improper grounding can cause electrical shocks or fires.
The stored energy within hydraulic systems only adds to the substantial risks.

Pinhole Leaks

Pinhole leaks in hydraulic lines can also be dangerous. Pressurized hydraulic fluid can forcefully
escape through small openings, resulting in fluid injection injuries, burns, and other hazards.
Immediate action to relieve hydraulic pressure and repair leaks is crucial, but it’s even better to
inspect and replace lines before they reach this point.

Unexpected Release of Pressure

Understanding the risks associated with removing or adjusting components in hydraulic systems
is just as vital. Working with pressurized hydraulic equipment can be very dangerous.
Components like valves, connectors, or hoses might unexpectedly release hydraulic pressure,
causing sudden movements or injuries.
Before removing or adjusting any parts, it’s essential to relieve hydraulic pressure and follow all
safety protocols.

When Should You Inspect Your Hydraulic Hoses?

Now, you hopefully know that regular inspection is key to maintaining the safety and efficiency of
hydraulic systems. But how often should you inspect your hoses?
While the exact timeline will probably vary depending on your industry and the frequency of use,
here is a good general schedule to follow:

  • Daily: A quick visual check for obvious signs of wear, leaks, or damage.
  • Weekly: A more thorough inspection, including checking connections and ensuring there are no signs of wear and tear.
  • Monthly: A comprehensive inspection, including pressure testing and checking for pinhole leaks.
Tips for Safely Inspecting and Replacing Hydraulic Hoses

When it comes to safely inspecting and replacing hydraulic hoses, there are several helpful tips
you’ll want to keep in mind.
First and foremost, always make sure that the machinery is turned off and properly isolated
before beginning any maintenance work. This step can prevent the accidental exposure to
high-pressure fluids that have the ability to cause serious injuries.
Next, visually inspect the hoses for signs of wear and tear, such as cracks, abrasions, or leaks.
Pay close attention to the hose fittings and connectors, as these areas are prone to damage. It’s
also important to check for any kinks or twists in the hose, which can compromise its
performance and safety.
After inspecting, if you find any damage or other potential issues, replace the hose immediately.
Always use the manufacturer-recommended replacement hoses and fittings to ensure
compatibility and reliability. When you’re installing new hoses, make sure they’re routed correctly
to avoid sharp bends and contact with moving parts, which can lead to premature failure.
Remember, the key takeaway here is that regularly scheduled maintenance and inspections
should be part of your routine. This can help you catch potential problems early and extend the
lifespan of your hydraulic systems.
When you carry out this maintenance, be sure to properly document all inspections and
replacements – that way, you can track the history and performance of your equipment over
time.

Routine Inspections Provide Optimal Performance

When it comes to maintaining the efficiency and safety of your hydraulic systems, there’s truly
no substitute for regular inspections. These need to be scheduled and conducted at consistent
intervals and tailored to the specific needs and usage of the system.
During each inspection, focus on identifying signs of wear and tear, verifying the integrity of
seals and hoses, and making sure fluid levels are adequately maintained.

By adhering to a routine inspection schedule, you can identify and address potential issues
before they escalate – and in doing so, hopefully extend the lifespan of the system and prevent
costly downtime.
Inspecting and replacing hydraulic lines isn’t just about maintaining equipment – it’s about
safeguarding your team.
Ready to take your hydraulic maintenance to the next level? Browse the Hose and Fittings
catalog
for a wide range of hydraulic components and feel free to reach out with any questions.
We’ll help you find the information and supplies you need to keep everyone safe – and your
equipment functioning exactly as it should.

FAQ

What are the safety precautions that need to be taken when working with
hydraulic systems?
Always remember to follow safety protocols like using insulated tools, proper lockout/tagout
procedures, and making sure everything is well grounded to steer clear of any electrical
mishaps.


What should be inspected for in hydraulic lines?
During inspections of hydraulic lines, keep an eye out for leaks, wear and tear, damage, or any
signs of deterioration to identify and address potential issues early and to keep your system
running smoothly.


How often should hydraulic lines be replaced?
The frequency of replacing hydraulic lines can vary based on factors like usage, environmental
conditions, and manufacturer recommendations, but as a rule of thumb, consider replacement if
you spot significant wear or damage during routine checks.


How often should hydraulic hoses be inspected?
For optimal performance, try to inspect hydraulic hoses every three to six months, adjusting the
frequency based on usage and environmental factors (more often than every three months
doesn’t hurt, either). This will help you catch any potential issues early on and extend the
lifespan of your hydraulic system.

What is a NPSM Thread and How Does it Work?

If you want to ensure the smooth operation and safety of your equipment, it goes without saying that you need to have the right components. After all, if you’re working in an industry where every detail counts – as so many of us are – you need to make sure you explore each and every technical aspect.

A common question asked here at Hose and Fittings is, “what is a NPSM thread?”

In this post, we’ll explain the NPSM and NPT meaning – and break down the differences between the two for you as well.

What is NPSM Thread?

NPSM, which stands for National Pipe Straight Mechanical thread, follows a standardized threading pattern, much like its cousin, NPT (National Pipe Thread). 

However, NPSM threads are unique due to their straight-grain, non-tapered design, which distinguishes them from the conical profile of NPT threads. 

NPSM is the American standard for threads used on fittings and pipes in plumbing and specific mechanical applications. NPSM threads, again, are straight threads designed to create a seal through the use of a gasket or washer rather than relying on the threads themselves for sealing. These threads most often tend to be found in fluid handling systems where a tight, leak-resistant connection is absolutely essential.

What Are Some Common NPSM Thread Characteristics?

Here are a few more characteristics (and benefits) of NPSM threads to pay attention to: 

Straight-Grain Design and Versatility 

An NPSM thread’s straight-grain design allows for easy installation and removal, typically requiring fewer turns than NPT threads, leading to quicker assembly. 

This characteristic makes NPSM threads suitable for applications that call for a quick, convenient connection without necessitating an extensive sealing process.

Ideal for Low-Pressure Systems 

NPSM threads’ sealing performance is not as robust as NPT threads, as their design doesn’t lend itself to creating a high-pressure seal. This makes NPSM threads excellent for low-voltage, non-exacting applications such as lighting fixtures, domestic appliances, and non-critical mechanical connections.

Widespread Application

Despite their reduced sealing capability, NPSM threads have a significant presence across various sectors. 

Whether it’s lighting or home appliances, mechanical connections, or certain low-pressure pipeline applications, the NPSM thread is there to help, offering a route to establishing connections that are efficient and adequate for their specific contexts.

Where is NPSM Thread Used?

So what settings might NPSM thread be useful for? 

To start, they’re common in the lighting industry, where they offer a sturdy installation as well as a safe, reliable electrical joint. 

They can also be used in household equipment. Whether in faucets, bathroom fixtures, or home appliances, NPSM threads serve as the unobtrusive link to connect different components within equipment. 

Mechanical engineering benefits extensively from the utility of NPSM threads, too. These play a crucial role in connecting pipes, valves, and sensors. 

Finally, in industrial settings, NPSM threads are a common sight. They’re a key part of the compressed air systems, cooling installations, and all kinds of industrial piping setups. They offer some level of convenience while also still meeting the stringent sealing requirements of certain applications – truly, the best of both worlds.

What is the Difference Between NPSM and NPT?

to the difference between NPSM and NPT, the devil truly is in the details. 

The most recognizable difference between the two lies in the thread’s taper. NPT threads feature a tapered design for enhanced sealing, especially in high-pressure applications, while NPSM threads are straight-grained and suitable for low-pressure systems. 

There’s also some differences in how they’re installed. Because of their respective designs, NPT threads demand more turns during the installation process to ensure a tight, effective seal,

whereas NPSM threads achieve the ideal connection with significantly fewer turns because of the straight-grain texture. 

In high-pressure or high-sealing scenarios, NPT threads reign supreme due to their sealing capabilities. NPSM threads aren’t as ideal for these situations, but can perform just fine in settings that don’t require extensive sealing. 

Finally, NPT threads are ideal for gas and liquid transmission systems, as well as pipe connections and, as mentioned earlier, other high pressure applications. NPSM threads are better for applications that don’t involve high pressure, like lamps and household equipment.

Choosing the Right Pipe Threading

Deciding whether to use NPSM or NPT threads isn’t necessarily a matter of personal preference, but of the task at hand. There are a few factors you’ll want to consider when deciding which is best. 

First, you need to understand the level of pressure and the sealing requirements of the job at hand. If you’re working on a high-pressure system, NPT is ideal. If it’s a low-pressure system where ease of assembly is a top priority, go for NPSM. 

If you’re on the hunt for a thread that offers exceptional sealing and a longer lifespan for your equipment, NPT might be the better choice, but if you value quick, hassle-free connections, NPSM will be the way to go. 

Ultimately, you’ll want to keep close tabs on industry standards and the thread types most commonly used in your sector. This can help you streamline your supply chain and maintenance processes. Assess the availability of fittings with your chosen threading type, too – some of this decision might end up hinging on supplier and market viability. 

Still can’t decide? Don’t be afraid to reach out for help. Here at Hose and Fittings, we’re happy to answer any questions you have to make sure you find the perfect fit on a case-by-case basis. Whether it’s NPSM, NPT, or any other acronym you have questions about, it would be our pleasure to help walk you through the process. 

Check out our selection today!

Copyright © 2025. All Rights Reserved.